Dome Heater Installation
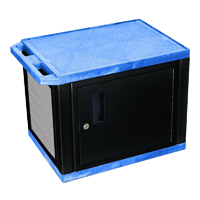
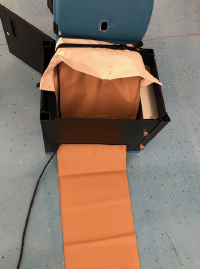
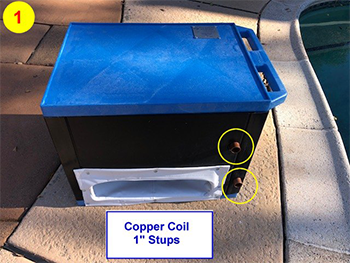
Begin by removing the dome heater from its packaging. You will find your extra parts inside the dome heater. Some units will require removing the handle of the blower in order to fit in the dome heater housing.
SIZING THE BLOWER: REMOVING THE HANDLE
In order to adjust the blower to fit properly into the Dome Heater Housing, the handle may need to be removed.
Tools you will need: Hacksaw. Phillips screw driver. A helper.
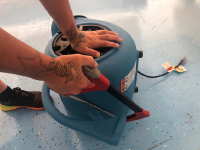
1. Use a hacksaw to completely remove the handle of the blower. Cut it off flush with the body of the blower (this will not affect the blower performance or its longevity).
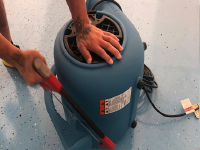
2. Turning the blower on its side will make it more stable while cutting.
3. Completely remove the handle.
4. There is no need to cover or plug the holes.
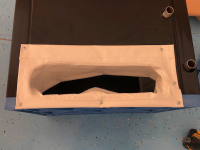
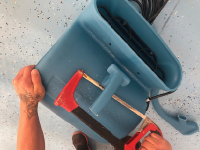
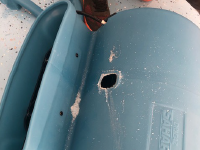
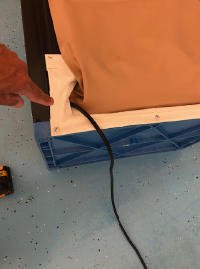
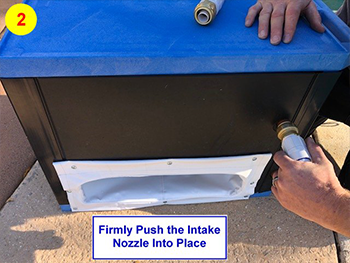
5. Remove the white vinyl boot from the heater housing by removing the attachment screws.
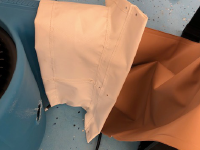
6. Slide the white boot over the snorkel tube and the snout of the blower so that it rests firmly up against the blower housing. You may have to tug on it a bit to get it into place.
7. This is what it will look like from the underside of the blower.
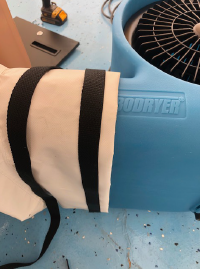
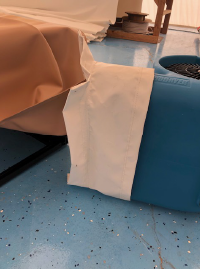
8. Use the black strap and buckle provided to fully wrap around the boot/snorkel tube/and snout. The buckle on the strap can be a bit tricky (see #9).
9. Snap the buckle and pull the black strap tightly. (If you are not able to tension the strap, it is looped incorrectly through the buckle. Try again!) Turn the blower power switch to the “ON” position and set the speed to the “High” setting (if you have a residential dome, the pressure switch will automatically turn the blower on and off as needed).
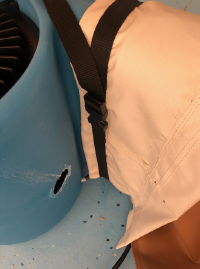
10. Slide the end of the snorkel tube down through the discharge port of the Dome Heater housing and lower the blower into the hole.
11. Pull the white boot flange completely through the opening and reattach it to the Dome heater using the same screw holes that originally were removed.
12. This picture shows how the power cord should be routed through the boot (there will also be a clear pressure sensor tube on residential domes).

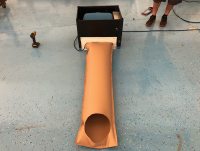

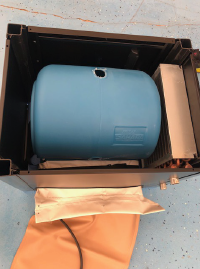
13. Here are a few views of a properly installed blower boot and snorkel tube.
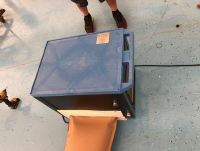
14. WATCH YOUR FINGERS ON THIS STEP: Carefully and evenly place the blue lid back on top of the Dome Heater housing. Press into place and secure with the four screws provided.
15. To turn the blower on or off, you can simply unplug it. To turn the unit off with the blower mounted switch or adjust the speed, use the key provided to unlock the rear door on the housing. The switches are located on the right side of the opening.
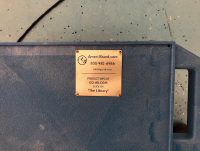
16. More product information about the Dome heaters and your Dome can be located at the library. The library is located as shown on the metal plate displayed in this picture. The location is at: go-ab.com (look for the “Library”).
Select HERE for a print PDF of these instructions.
Placement of Your Blower/Dome Heater
Dome heaters operate by forcing the pool's warm water through the dome heater unit. Normally, they are easily "plumbed" into the pool heater return line coming directly off the pool heater. View Water Routing Diagram.
Note: Try to keep the distance between your pool heater and your dome heater as short as possible.
The blower/heater combo is usually placed near the pool's pump, filter, pool heater, etc. Be sure to keep your plumbing routing in mind when selecting a blower/heater location. Once you've decided on the right spot, it's time for the installation.
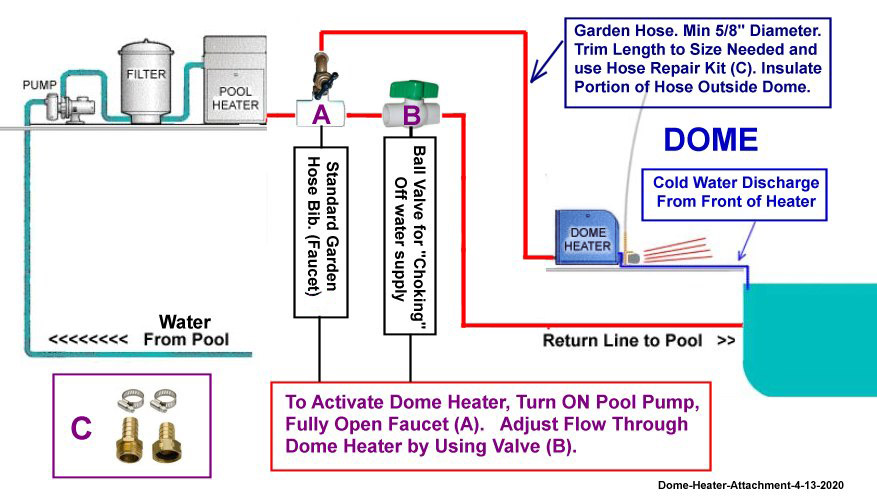
Installing the Dome Heater
There are a few extra items you will need to install the dome heater when attaching it directly into the return line from off the pool heater.
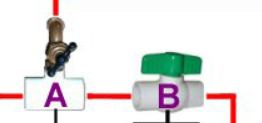
- One 1 1/2" " PVC "T" fitting with a standard hose bib attached. Shown as "A" (below).
- One 1 1/2" ball valve. Shown as "B" (below).
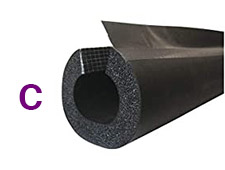
- Two adequate lengths of good quality 3/4" inside diameter garden hose. You will need one hose that is long enough to reach from your pool heater to the dome heater and a second hose that is long enough to reach from the dome heater into the pool to discharge the cold water. Use the shortest lengths possible to allow maximum efficiency. Shown as "C" (below).
- An adequate length of hose insulation to reach from your hose bib at the pool heater to the location of your dome heater/blower. This soft foam insulation is available at your local hardware store and is the same type used to insulate a pipe from freezing. The insulation increases efficiency and keeps water from freezing in the hose in cold weather climates. See image (below).
- Route the return garden hose under the cable anchor of the dome and place hose so that it discharges directly into the pool. It's a good idea to allow the discharge hose to dangle in the water a couple of feet.
- Once the unit is "plumbed" properly, and the hoses have been sized to fit correctly, install the foam insulation on the part of the hose that comes from the supply hose-bib to the dome heater.
 |
 |
 |
 |
 |
Using the Dome Heater
The dome heater is activated by turning on the hot water supply at the hose bib and turning on your pool pump if it is not already on. For safety reasons, keep small children away from the discharge hose in the pool as the water may at times be fairly warm.
Important Note! If you live in an area that experiences very cold temperatures, 25 F or colder, and your blower is controlled by a pressure switch (typically residential models) the water supply to the Dome must be turned off and the Dome Heater must be drained if the power goes out. In addition, compressed air needs to be blown through the hose and Dome Heater. Water left in the Dome Heater may freeze and rupture the tubing. This does not apply to commercial domes where the pump for water circulation is required to run 24/7. In addition, if the dome heater housings were to be elevated at the rear of the unit, (approx 1-1/2 to 2") then even if the power went off, the units would self drain and help to prevent freezing.
Ideally, the water supply hose should be as short as possible, 3/4" diameter, and the water supply should come directly off of the plumbing closest to the actual pool pump. If using a garden hose to supply water to the dome heater, it should be insulated. By insulating the Garden Hose, less heat is lost on the way to the Dome Heater, therefore, making it warmer inside the Dome and this also helps to keep the Hose from freezing and rupturing.
If the dome heater coil is allowed to freeze, it can rupture. The manufacturer of the coils does not warrant them against freezing. Replacement coils are available for purchase and can be installed locally.
Need More Help?
Please don't hesitate to contact us online or call us at 1-800-982-6966 for additional tech support.
Return to Dome Main Page - See Additional Dome Resources


